Showing posts with label garlic. Show all posts

July 5, 2011

Pesto

There was a time in my life when I refused to eat pasta with "red sauce." I would only eat pasta with pesto. While I have become much less picky about my pasta sauces as I've, um,... matured, I still think pesto is delicious. I would eat it with a spoon if I could get away with it.

Pesto is usually quite expensive to buy at the grocery store. As you can imagine, I've often entertained the idea of making my own. The problem is that it is also expensive to make. Pine nuts are expensive. Basil can be expensive. Good olive oil is expensive. Good Parmesan is expensive. It can add up. And while not exactly cheap, pesto is less expensive to buy at Costco than to make from scratch. Or so I have told myself.

So, all my good intentions of making my own pesto over the last couple of years have been thwarted. Until now. I have recently found out that you can make pesto with nearly any kind of nut--not just pine nuts. Break through! I usually have pecans and other nuts on hand, so that is no extra cost. I used a pecan and walnut combo in this version, but feel free to substitute whatever kind of nut you have available. I have heard that almond pesto is also very good.

Also, it is prime basil season out there, at least up here in Portland. I was at the farmer's market and I could not get away from the sweet, herb-y smell of fresh basil. One stand was selling three bunches of basil for $5. (The equivalent of at least 5 cups of basil leaves.) I couldn't resist--especially because I just happened to have some Parmesan in the fridge. I was pesto ready and I couldn't deny it any longer.

I first tried to use the Magic Bullet that I had recently received as a gift, but no dice. I whipped out my mini-food processor and turned my basil into pesto in no time. This is an easy and quick recipe that is very flexible. I tried to use as little olive oil as possible, since I find the store-bought kind too greasy. That is the added benefit of making your own--you get to make it precisely the way you like it.

I used a cup of this freshly made pesto to make a pesto potato salad for a Fourth of July barbecue, which I will post shortly. I have a ton of pesto left, too, so I see some pesto pasta in my near future. For the quantity of pesto this makes, it definitely ended up being cheaper than buying it at the grocery store in the end.  Worth it, for sure.

Happy summer!

Pesto
  • 4 cups packed fresh basil leaves, washed and dried
  • 2/3 cup to 1 1/2 cup olive oil, depending on your preference (use olive oil that tastes good on it's own)
  • 1 cup toasted nuts, chopped (walnuts, pecans, almonds, pine nuts)
  • 5 or more cloves of garlic, or more to taste
  • 1 cup grated Parmesan
  • 1 teaspoon salt, or more to taste
  1. Put basil, olive oil, nuts and garlic and salt in food processor.
  2. Blend until combined
  3. Add Parmesan and blend for a few seconds until incorporated.
Makes at least 2 cups. You can easily half this recipe for a smaller batch.
To store: cover with surface completely with plastic wrap and refrigerate for up to a week.

May 5, 2011

Garbanzo, Herb and Spinach Salad

Day off + reading food magazines + sunny weather (finally!) + impromptu barbecue = garbanzo, herb and spinach salad. You know, sometimes these things just come together. I'm glad these confluent factors led to this dish!

This salad is easy, slightly exotic, and combines really powerful flavors in an absolutely perfect balance. The garlic, basil, parsley, Parmesan and lemon juice combine fantastically complementary notes, and the toothsome garbanzo beans add texture, protein and heft. This salad has flavors reminiscent of a good pesto, but at a much lower cost. (Especially if you pick up a whole basil plant at Trader Joe's for only $2.99 instead of buying the cut herb at the store.) This salad could be easily adapted to include whatever else you happen to have in your fridge.

I found this recipe in Molly Weizenberg's (aka OrangetteBon Appetit column. I wanted to make it more of a salad salad, so I added a bed of spinach tossed with an easy olive oil and lemon juice salad dressing. The result was perfect for pairing with barbecue, or serving at a picnic, or eating whenever and wherever on a lovely spring or summer day.

P.S. It was possibly even better the next day.

Garbanzo, Herb and Spinach Salad
  • 2 (15 oz.) cans garbanzo beans, rinsed and drained
  • 4 tablespoons chopped fresh basil
  • 4 tablespoons chopped fresh Italian parsley
  • 4 tablespoons freshly squeezed lemon juice
  • 8 tablespoons extra virgin olive oil
  • 2 gloves of garlic, pressed or finely minced
  • 2/3 cup packed freshly grated Parmesan and/or Romano cheese
  • Kosher salt and freshly ground black pepper to taste
  • 1 pound or more baby spinach
  • Lemon and Olive Oil Dressing, to taste
  1. Combine chickpeas, basil, parsley, lemon juice, olive oil and garlic in a medium bowl. Add cheese and toss gently to blend all ingredients thoroughly. Season to taste with salt and pepper.
  2. Toss spinach with dressing. Top spinach with garbanzo mixture to serve, pass remaining dressing if anyone wants more!

April 3, 2011

Easy Salad Dressing

I needed a salad to bring to a dinner party. The main course was clam chowder, so I wanted something light for the salad dressing. I love clam chowder,  but I didn't want the whole dinner to be too rich and creamy. I found a quick, easy and "bright" dressing online and made minor adjustments. Lemon juice replaces vinegar in this dressing which makes it just different enough than a vinaigrette to keep things nice and interesting. The garlic adds a great depth of flavor. (If you are not into garlic, substitute with something you like and post the variation in the comments!) The salad was a hit!

Lemon, Garlic and Olive Oil Dressing
  • 1/2 cup extra virgin olive oil
  • 1 cup freshly squeezed lemon juice
  • 3 cloves of garlic, minced or pressed (more or less to taste)
  • 1/2 tsp freshly ground black pepper (or more to taste)
  • 2 tsp salt
  1. Add all ingredients to a container with a tightly sealing lid.
  2. Shake contents vigorously until the oil is well-incorporated, about 1 minute.
  3. Drizzle over salad and toss to coat.
This recipe makes a large batch. Store remaining dressing in the refrigerator.

November 9, 2010

Brussels Sprouts with Pecans and Onions


Maybe it's because I came late to brussels sprouts, but I can't get enough of them. Maybe I am making up for lost time.

For those of you who don't understand where I am coming from, I'm sure that there is a way to cook brussels sprouts so that they don't taste good. Probably it was the way your parents prepared them for you when you were little. Maybe you hated them. I say, fair enough. Those brussels sprouts very well could have been nasty. I'm not going to tell you they weren't.

But I am going to tell you that, cooked properly, brussels sprouts are simply phenomenal. I like roasted brussels sprouts so much that I even like them cold, as left overs from the night before. Now, that is not necessarily the ideal way to enjoy these nutritious veggies, but I'm just saying that are THAT good.
(On a side note, why are brussels sprouts so unfairly maligned in popular culture?)

Normally, I follow Amber's recipe: a simple toss-with-olive-oil-and-roast preparation. I love it. The roasting imparts a mellow, nutty flavor and caramelizes the edges into a perfect crunchy sweetness. I don't know why I wanted to try another recipe for brussels sprouts last night, since I am so satisfied with the first, but I decided to get crazy. Maybe it was the pecans. Or the onions.

I do know that I couldn't get rid of the roasting, so I adapted this recipe from Saveur (the best food magazine in existence--and also wonderful to follow on facebook, by the way) to accommodate the roasting process.  This recipe is slightly different than the plain roasting method, but I don't want to say it is better. The pecans and onions compliment the brussels sprouts nicely and make this a particularly great dish for cold fall and winter nights. It kind of gussies them up a little. I'm going to add this into my regular brussels sprouts rotation, because I do love a little variety in my life. Even if it's just in my brussels sprouts.

Brussels Sprouts with Pecans and Onions
  • 1/4 cup of toasted pecans
  • 1 pound of brussels sprouts
  • Olive oil (just enough to coat the Brussels sprouts...but the more the tastier)
  • Salt and pepper to taste
    As you can see, we added a bit more onion...
  • 1 tablespoon butter (or olive oil)
  • 1/2 of a medium white onion
  • 1 or 2 cloves of garlic
  1. Heat oven to 425 degrees. Chop and toast the pecans on a baking sheet in a single layer for 3 to 4 minutes, until they are fragrant and browned.
  2. Meanwhile, chop brussels sprouts in half. In a large bowl, toss brussels sprouts with olive oil, salt and pepper. Roast in the oven for 15-20 minutes, until they are as browned as you like. (I like mine on the crispier side.)
  3. While the brussels sprouts are almost done roasting, heat a large pan over medium-high heat. Chop your onion. Add butter or olive oil to the skillet and let it melt. Add onion and stir to coat. Mince the garlic and add it to the pan. Sautée until the onions are golden, about 5 minutes. Stir in roasted brussels sprouts and cook for a couple minutes more. Stir in pecans and adjust salt and pepper to taste.
Serves 2-4

    January 22, 2010

    Kale with Onions and Garlic

    I always wanted to like kale more than I actually did. The first time I had it, my vegan roommate sauteed it before adding it to some dish she was making. I was intrigued and pleasantly surprised by this kinda scary looking, dark leafy green. The first time I used it, I added it to a potato, kale and chorizo soup. First of all, I couldn't believe how much went into the pot, and then when I tasted it I was a little underwhelmed. The potatoes and the sausage stole the show. But, like magic, as the soup---how shall I say it---matured, the kale became more and more delicious with each bowl. It was growing on me.

    I've also tried sauteing kale on various occasions and found it decent, but not fantastic. Still, for some reason, I always cut out every single kale recipe I found. And recently, I found out that kale is probably the most nutrient-and-antioxidant-dense food on the planet. I wanted to LOVE kale! Why didn't I?

    Well, luckily I never gave up. I soon came across a recipe that boiled the kale before sauteing it garlic and onions. Perfect! Amazing! It's everything I always wanted kale to be. It is honestly my favorite thing to cook and eat right now. So satisfying---AND healthy. This is a win-win recipe.

    Kale with Onions and Garlic
    • 1 bunch of kale, rinsed
    • 1 tablespoon olive oil, or more to taste
    • 1 medium onion, chopped
    • 3-6 garlic cloves, pressed or minced
    • Salt and pepper to taste
    1. Bring a large pot of salted water to a boil.
    2. Remove kale leaves from stems by folding leaves in half, then chopping off the core. Tear leaves into smaller pieces. Add kale to boiling water, stirring well to incorporate. Cover and cook for 8 minutes, until the kale is almost tender. Drain.
    3. Heat olive oil over medium heat in a large skillet. Add onion and cook stirring occasionally until translucent. Add garlic, stir and cook 1-2 minutes more.
    4. Add kale and stir to toss in the garlic and onions. Cook a few minutes more, until the kale is tender and the flavors have blended. Season with salt and pepper. Serve hot.

    November 15, 2009

    Goat Cheese Crostini


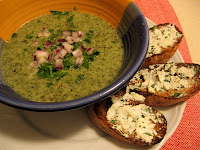
    These are so simple and yet so incredibly flavorful and delicious! The creamy tang of the goat cheese and the sharp, savory bite of the garlic. The freshness of the parsley. We paired these with a mild potato soup and these were the standouts. We had a few left over and we figured they wouldn't necessarily store well, so we had the remainders for dessert.

    These crostini are not particularly ground breaking, and yet I never would have thought to combine these flavors just so. I combine a few techniques I've gleaned from various sources here, but the cheese spread is actually from Meals in Minutes, a Weight Watchers cookbook. Who knew they'd have anything to add? Well, try these and you will see that they certainly do.


    Goat Cheese Crostini

    • 1 baguette
    • 2 cloves of garlic
    • Olive oil for brushing (of olive oil spray)
    • Salt, pepper, thyme, other seasonings to taste
    • 1/4 cup goat cheese
    • 1/8 teaspoon freshly ground black pepper (or more to taste)
    • 1 tablespoon chopped flat leaf parsley
    • 1 teaspoon olive oil
    1. Preheat broiler. Slice baguette on a bias into pieces 1/2 inch thick. Lay slices in a single layer on a baking sheet. Chop 1 clove of garlic in half. Rub the cut edge on the top side of baguette slices. Spread a thin layer of olive oil on slices with a pastry brush, or spray slices well with an olive oil spray. Sprinkle with salt, pepper and other seasonings to taste.
    2. Toast slices under broiler for 1-2 minutes until crispy and golden. (They will burn really quickly if you don't keep a close eye on them.)
    3. In a small bowl, combine goat cheese, pepper and parsley. Press in the remaining garlic clove with a garlic press (one of the best tools ever!) and add the oil. Mix until smooth. Spread on the baguette slices. Pop them back under the broiler for 1 minute to lightly melt the cheese mixture. Serve immediately.

    April 14, 2009

    Croutons

    These are my favorite croutons!

    First you start with fresh sour dough french bread. A really good quality loaf. Slice it up into little cubes. You can do small or medium or large, it all depends on your style. Sometimes I make large and small if I'm doing soup and salad. Small for the salad, large for the soup. These are practically your garlic bread and croutons all in one.

    Preheat oven to 375

    Then whip this up in a blender:

    2-4 cloves or garlic (depends on your desires or your plans for later that night, if you know what I mean...)
    4 Tb spoons of butter
    1/3 cup of extra virgin olive oil
    1/2 ts sea salt*
    herbs (I love this with herbs de Provence, but a bit of oregano, basil, parsley, and/or tarragon will do)

    Blend until super creamy. Feel free to add more oil if it's thick. It needs to be runny.

    Put all of your cubed bread in a large plastic bag without any holes. I use a garbage bag. Then pour the buttery-oily-garlicky mixture over the bread, twist the bag closed at the top leaving some air in the bag (like a balloon). Then SHAKE, SHAKE, SHAKE!

    Once everything is coated spread them evenly on a baking sheet and bake at 375 for 10-15 minutes, check regularly, toss as needed. Once they start to brown, it will happen quickly so stay close, take them out and let them cool. You'll be tempted to eat one right away. Trust me, even after you blow on it for a minute it will still burn your mouth. I have to learn this lesson EVERY TIME, so maybe you can learn from my experience. Just wait another minute, and dig in! They can be stored in a ziplock bag for a while once they have cooled completely.

    *If you are still using table salt in your home do your food a favor and replace it next time you're at the store. Buy some sea salt (you can even get it in bulk sometimes) and keep a little bowl in the kitchen ready to offer you a pinch any time you need it. At the very least replace your table salt with kosher salt. After a little while you'll understand and never go back.

    March 18, 2009

    Fettucine with Crispy Garlic, Sage and Sausage

    Whenever I see a recipe I want, I cut it out and paste it in a notebook. I started doing this years ago and now I've nearly filled it up. It's not organized in any way, but I've memorized the order of the recipes from flipping through them so many times. When I need to make something, I scan through all of the recipes until I find a few that sound good. Usually I need someone else to help me make the final decision.

    This is a recipe I clipped from Bon Appetit awhile ago that kept catching my eye. The first couple of times I saw it, I ended up making something else, but this one wouldn't let me go until I made it. It was rich and delicious--and a welcome departure from our default tomato sauce pasta.

    • 3/4 pound egg fettuccine (we couldn't find egg fettucine, so we used another egg pasta)
    • 2 tablespoons butter, divided
    • 1/4 cup olive oil (less would be fine)
    • 8 garlic cloves, peeled, thinly sliced (Definitely consider using way more if you like garlic)
    • 2 tablespoons finely chopped fresh sage
    • 1 pound sweet Italian turkey sausages, casings removed (we substituted cooked spicy Italian sausage and it was delicious)
    • 1/4 teaspoon dried crushed red pepper (optional)
    • 1 cup (approx. 3 ounces) grated Asiago cheese (maybe more)
    1. Boil your pasta in a large pot of lightly salted water according to manufacturer's instructions.
    2. Meanwhile, melt 1 tablespoon butter with oil in a large, heavy skillet over medium heat. Add garlic slices and saute until they've achieved desired crispy golden deliciousness (about 45 seconds to a minute). Using a slotted spoon, remove garlic and set aside.
    3. Increase heat to medium high. Add the sage and stir until beginning to crisp-around 10 seconds (although a little longer/crispier would be good, too). Add sausage and saute until browned/crispy in spots.
    4. Drain pasta and add to the skillet with sage and sausage. Add the remaining 1 tablespoon of butter. Sprinkle with crushed red peppers and season to taste with salt and pepper. Toss the pasta to mix all ingredients.
    5. Serve topped with crispy garlic and grated asiago cheese. (We actually mixed some of the cheese into the pasta while it was still in the skillet, so it melted in. Tasty!)