December 27, 2010

Maple Pecan Shortbread Cookies

I used to work for Starbucks in California. In the pastry case, full of terrible-for-you and not-even-that-good-tasting pastries (I guess I would rather have homemade), there was one treat that stood out. A scone. A maple oat nut scone to be exact. This scone had a wonderful maple flavor, was studded with pecans, and iced with a perfectly sweet glaze. So many delicious flavors converging in one little pastry!

But, I moved to Oregon and, alas, the Starbucks in Oregon do not carry the delectable maple oat nut scones. Sad, sad day.

These maple pecan shortbread cookies have been on my to-bake-soon short list ever since I opened my copy of Martha Stewart's Cookies. I've made many wonderful cookies from that book in the intervening years before finally getting around to these. I'm sorry it took me so long.

These cookies knocked the socks off of everyone I've shared them with. They really are a perfect winter cookie. As I've already established, maple and pecans are a natural and particularly tasty pairing. The shortbread here only compliments and highlights these homey and satisfying flavors.

In fact, these taste just like a cookie version of my favorite and now distant scones. These cookies will more than suffice in their absence. I will definitely curl up with a small stack of these and a cup of Starbucks coffee. I will once again know maple pecan bliss. Thanks, Martha!

Maple Pecan Shortbread Cookies
  • 2 3/4 cups flour, plus more for work surface
  • 1/2 teaspoon salt
  • 1/2 cup pecans, finely chopped
  • 1 cup (2 sticks) unsalted butter, room temp.
  • 3/4 cup sugar
  • 1/4 cup pure maple syrup, preferably grade B
  • 1 large egg yolk
  • 1/4 teaspoon pure maple extract
  • 1 large egg lightly beaten
  • 24 pecan halves, for decorating
  • Turbinado sugar (or regular sugar) for sprinkling
  1. Sift flour and salt into a bowl. Whisk in chopped pecans.
  2. In the bowl of an electric mixer, beat butter and sugar on medium-high speed until smooth and light, about 1 minute. Add maple syrup, egg yolk and extract. Beat on medium until well combined. On low speed, gradually add flour mixture, beating until just combined. The dough should be smooth and pliable. 
  3. Turn dough out onto plastic wrap. Flatten into a disk, wrap it up and refrigerate until firm, 1 /2 hours to overnight.
  4. Pre-heat oven to 350 degrees. Line two baking sheets with parchment.
  5. On a lightly floured work surface, roll out dough to 1/4 inch thick. (I had to let my dough warm up a little before it would roll out.) Cut out rounds using a 2-inch cookie cutter. (The only cookie cutter I had was heart shaped, though the hearts didn't really turn out in the end.) Place on a baking sheet. Brush the tops with beaten egg and place a pecan half in the center of each cookie. Sprinkle cookies with sugar.
  6. Bake cookies, rotating halfway through, until golden around the edges, about 10 to 12 minutes. Transfer to a wire rack to cool. 
Makes about 2 dozen

December 23, 2010

Roasted Pear Salad with Blue Cheese and Walnuts


Ever have a recipe that you know you want to make, but it takes you a little while to actually get around to making it? Ever have one that took you two years to finally make? Well, this is mine.

I first saw this recipe while I was at the gym. I've mentioned before that watching the Food Network was basically my main reason for going to the gym. (I don't have cable, OK?!) If my timing was wrong, I'd get stuck with Paula Deen or Sandra Lee. But if the stars aligned in my favor, I'd get to watch Ina Garten's show, The Barefoot Contessa.

Ina's recipes always look delicious and she seems like she'd be a sweet person to have as a next door neighbor. So there I was one day, all sweaty and whatnot, and Ina comes on and makes this wonderful looking pear salad. It's got blue cheese and walnuts and dried cranberries, and all manor of delicious ingredients. And it doesn't look hard to make. I put it on my mental list of recipes I really want to try.

Subsequently, I went so far as to bookmark the recipe on my laptop. It languished there for two whole years. I never forgot about this recipe, but somehow I never went out of my way to get the ingredients, either. Then last week, somehow after all this time, it happened.

Pears were on sale at my normal supermarket, so I bought two. Later, on a whim, I stopped at a Grocery Outlet--which by the way has an excellent cheese selection if you didn't already know. I got a big hunk of blue cheese for next to nothing. I knew I had nuts and cranberries on hand. This was finally coming together! I picked up some spinach and lemons and I was ready to go.

Or so I thought. As I started making this salad, I realized that I used up my dried cranberries making some cookies recently. I dug around and found some dried blueberries--sometimes you have just have to substitute. Then I got to the part about apple cider, which I never have on hand and forgot to buy. "Oh man, I really blew it now," I thought. Just when I thought I had it! I was trying to come up with something I could use in place of apple cider...

when Mark reminded me that I randomly happened to have some on hand, probably for the first time ever. I am working in a fifth grade class and after their Christmas party we had extra Martinelli's left over. The teacher gave me a bottle. I had completely forgotten about it. But there it was in my refrigerator--a veritable Christmas miracle, if you ask me!

Long story not-so short, this recipe finally came together (in adapted form) two years after it initially piqued my interest. It was oh so worth the wait.

Roasted Pear Salad with Blue Cheese and Walnuts
  • 2 pears, ripe but still firm
  • 1/4 cup fresh squeezed lemon juice (from about 1 lemon)
  • 3 oz. blue cheese, crumbled (plus more for sprinkling)
  • 1/4 cup dried blueberries or cranberries
  • 1/4 cup walnuts or pecans (plus more for sprinkling)
  • 1/2 cup apple cider
  • 2 tablespoons red wine or port
  • 1/3 cup lightly packed brown sugar
  • 1/2 cup extra virgin olive oil
  • 1 lb. baby spinach or arugula
  1. Preheat the oven to 375 degrees. Peel the pears and slice them in half lengthwise. Chop off a little of the rounded sides so that they will be sit steadily in the baking dish. Scoop out the seeds with a spoon or melon baller, leaving a well for the filling. Toss the pears in the lemon juice, to help them from browning. Arrange the pears, core-side up in a small baking dish and set aside.
  2. In a small bowl, mix together the blue cheese, berries and nuts. Divide the mixture among the wells in the pears, compacting it into the wells and mounding it up a bit. (If you have extra, sprinkle it on the salad.)
  3. In the same bowl, mix the apple cider, wine and brown sugar. Stir to dissolve the sugar. Pour over and around the pears in the baking dish. Bake pears, basting occasionally with the liquid, until tender--about 30 minutes.
  4. Meanwhile, just before the pears are done, whisk together the olive oil and lemon juice. After you take the pears out of the oven, add 1/4 cup of the basting liquid to finish the dressing. In a large bowl, toss the greens with the desired amount of dressing. Pour rest of dressing into a serving vessel.
  5. Separate the greens onto 2 large plates. Place 2 warm roasted pear halves on each bed of greens and sprinkle with desired about of blue cheese and nuts. Serve immediately, with extra dressing on the side.
Serves 2 as a main course or 4 as an appetizer

December 20, 2010

Browned Butter White Chocolate Chip Cranberry Cookies

Let us talk about decadence. Let us talk about Christmas cookies. Let us talk about butter. Lots and lots of butter--browned butter to be exact.

These browned butter chocolate chip cookies have that caramelized, butterscotch-y taste that makes the most memorable chocolate chip cookies so memorable. They also have those crispy-delicious crunchy edges juxtaposed with a soft center. It is impossible to choose my favorite part of these cookies--it is the overall experience that makes them so grand.

These cookies, when made with white chocolate chips and dried cranberries, are not messing around. This is one rich, sweet cookie. But I contend that the holidays are a perfect time for this cookie. We all indulge a little this time of year, right? These cookies also involve two extra steps. When you are baking a lot for the holidays, maybe you are not inclined to make cookies that have two extra steps. Maybe you just want to get the cookies over with. Those regular cookies will taste good, I don't doubt it for a second.

BUT, I assure you these cookies will taste better. Like many things that take a little extra effort, it is worth it! First, there is the browning of the butter, which imparts a lovely depth and adds extra complexity. I actually really like this step because when I want to make cookies, I rarely remember to get butter out so it can warm to room temperature. Here you melt the butter, so it eliminates that problem altogether.

The second extra step doesn't take much effort, just a little extra time. You whisk the butter and sugars and then let them rest. Over an interval of about ten minutes, you repeat that process a few times. During this step, the sugars dissolve. To be honest, I don't know exactly how dissolved sugar helps these cookies. You'll have to ask Cook's Illustrated about that. Maybe it's a textural thing. All I know is that it works.

So bake a batch or two. Share some. Save plenty for you and yours. Curl up on the couch near the Christmas tree. Have your friends and family gather 'round and give everyone a cookie. To me, this is what the holidays are all about.

Browned Butter White Chocolate Chip Cranberry Cookies
  • 3 1/2 cups flour
  • 1 teaspoon baking soda
  • 28 tablespoons (yes, 3 1/2 sticks) unsalted butter
  • 1 cup white sugar
  • 1 1/2 cups dark brown sugar
  • 2 teaspoons salt
  • 4 teaspoons vanilla
  • 2 large eggs
  • 2 large egg yolks
  • 2 1/2 cups white chocolate chips
  • 1 1/2 cups dried cranberries
  1. Put an oven rack in the middle position and heat oven to 375 degrees. Line two large baking sheets with parchment paper. 
  2. Whisk the flour and baking soda together in a medium bowl. Set aside.
  3. In a large heatproof bowl, cut 8 tablespoons (1 stick) of butter into a few pieces. Set aside. Heat 20 tablespoons (2 1/2 sticks) of butter in a light colored skillet over medium-high heat. (Do not use a non-stick pan if you can avoid it. You need to see the color of the melted butter to know when it has browned.) Once the butter is melted, continue cooking and stirring until the butter is a dark golden brown and has a nutty aroma, 2-3 minutes. (This will seem to take awhile, but change will happen quickly so pay close attention.) Remove the skillet from heat and our into the large bowl. Stir until all of the butter has melted.
  4. Add both sugars, salt and vanilla to the butter and whisk until fully incorporated. Add the eggs and the egg yolks. Whisk until smooth. Let the mixture stand for 3 minutes, then whisk for 30 seconds. Repeat process of resting and whisking 2 more times. The mixture should be thick, smooth and shiny.
  5. Stir in the flour mixture until just combined. Stir in white chocolate chips and cranberries, making sure no flour pockets remain.
  6. Spoon dough in 3 tablespoon portions spaced 2 inches apart on prepared baking sheets. (These cookies will spread, so I recommend 8 to a sheet for perfect cookies. 10 to a sheet if you don't mind the edges sometimes touching.) Bake cookies 1 tray at a time, rotating halfway through, until the cookies are golden brown and still puffy; the edges will have begun to set, but the centers will still be soft--10 to 14 minutes. 
  7. Cool cookies on the baking sheet placed on a wire rack until the cookies can be transferred to the rack itself to cool completely. (If you can wait that long.)
Makes 3 dozen cookies

December 13, 2010

Pumpkin Spice Layer cake with Caramel Cream Cheese Frosting


Is it so wrong to eat birthday cake for breakfast? Yeah, I didn't think so, either.

I relish the opportunity to make fancy cakes, since I so rarely get the chance. I guess that's not exactly fair---I could make a fancy cake anytime, really, but that would be a dangerous, dangerous idea. I reserve my fancy cake baking to birthdays. Usually my own.

This year I was agonizing over two really amazing-sounding recipes, but an informal poll on the Recipes For Laughter facebook page proved the pumpkin spice cake the most popular. I'm glad it was. It's hard to say which aspect of this cake was my favorite. The cake itself has the perfect dense-but-fluffy crumb---maybe even the platonic ideal of a birthday cake crumb. The combination of spices in this cake was truly spot on. The spices made this cake seem more pumpkin-y than any other pumpkin dessert in my recent memory, yet the flavor was not at all overwhelming (as some heavily
spiced cakes tend to be). This cake had a perfect balance of warm spices and pumpkin flavor. It easily could have been my favorite part of this cake...if it weren't for the frosting.

By now you may have picked up on the fact that I am an unrepentant cream cheese frosting enthusiast. Give me any excuse to top something with cream cheese frosting, and I will. But, this cream cheese frosting was a revelation. You make a quick and easy caramel from powdered sugar and heavy cream, then mix it into your typical cream cheese frosting. I love caramel nearly as much as I love cream cheese frosting, so this was a match made in frosting heaven. It was bordering on cloyingly sweet, so if you are not really into that, I would recommend adding less powdered sugar or adding more cream cheese to mellow out the sweetness a little.

I think this cake would have been even more perfect with some candied pecans on top, but I ran out of time before my guests arrived. I guess I should stop throwing myself birthday parties...

Ok, that's not going to happen. There's no way I'm giving up an excuse to make myself fancy cakes. Even if that means I have to eat cake for breakfast for days afterward.

Pumpkin Spice Layer Cake with Caramel Cream Cheese Frosting
For the Frosting:
  • 1 pound of powdered sugar, divided (from a 1 pound box, or approx. 3 1/2 to 4 cups)
  • 1/2 cup plus 1 tablespoon heavy whipping cream
  • 1 teaspoon vanilla extract
  • 1/4 teaspoon salt
  • 1 8-ounce package cream cheese, room temp.
  • 1/4 cup (1/2 stick) unsalted butter, room temp.
For the cake:
  • 3 cups all purpose flour
  • 2 teaspoons baking soda
  • 2 teaspoons baking powder
    T's cake-slicing ability is unmatched.
  • 1 teaspoon cinnamon
  • 1/2 teaspoon ground ginger
  • 1/4 teaspoon ground cloves
  • 1/4 teaspoon freshly ground nutmeg*
  • 1/4 teaspoon ground allspice
  • 1/4 teaspoon ground cardamom
  • 1 15-ounce can of pure pumpkin
  • 1 1/2 cups sugar
  • 1 1/4 cups vegetable oil
  • 4 large eggs
  • 2 teaspoons finely grated orange peel
  1. Preheat the oven to 350 degrees. Butter and flour two 9-inch cake pans, tapping out any excess flour.
  2. Sprinkle 1/2 cup powdered sugar over the bottom of a small non-stick skillet over medium heat. Cook without stirring until the sugar melts. Continue cooking, stirring occasionally, until the sugar is a deep amber color, about 2 minutes more. Stir in 1/2 cup cream, vanilla and salt--be careful, as the mixture will bubble up. Stir until any caramel bits have dissolved. Stir in remaining 1 tablespoon of cream. Strain caramel sauce into a small bowl and cool to room temperature.
  3. Whisk flour, baking soda, baking powder and spices (through cardamom) in a large bowl.
  4. In another large bowl, beat pumpkin, sugar and oil with an electric or stand mixer. Add eggs 1 at a time, beating to incorporate between each addition. Mix in orange peel. Add flour mixture, beating on low just enough to blend.
  5. Divide batter between prepared pans and bake until a tester inserted into the center comes out clean--about 33 minutes. Cool in pans on racks for 10 minutes. Carefully invert cakes onto rack and then turn them top-side up to cool completely.
  6. While the cakes are baking, sift the remaining powdered sugar into a medium bowl. Using an electric or stand mixer, beat the cream cheese and butter in a large bowl. Gradually beat in powdered sugar. Beat in the cooled caramel. Cover and chill frosting until firm enough to spread, about 2 hours.
  7. When cakes are cool, use a long serrated knife to cut the rounded top of off of one of them, leaving a flat surface. Place that cake on a cake plate cut-side up and cover with 3/4 cup of frosting. Place second cake on top. Cover top and sides of cake with remaining frosting.
Serves 12-16

Note: Cake can be made up to 2 days ahead. Just cover and chill. Let stand at room temp. 2 hours before serving.
*Buy whole nutmeg wherever bulk spices are sold. Whole nutmeg looks expensive, but if you just buy one (which is more than enough for this recipe) it will probably cost you less than a dollar. Grate the nutmeg with a microplane or the finest holes on your grater just before using.

December 12, 2010

Brussels Sprouts Gratin


Brussels Sprouts are a seriously misunderstood and undervalued vegetable. I love brussels sprouts. I think I have always loved them, but ever since I have discovered the many ways of preparing brussels sprouts, I seriously cannot get enough of them. I also love helping people learn to love brussels sprouts. If I can convert one person to become a non-eater to an eater with one dish, then my job is done.

I found this recipe in Bon Appetite under the 'Learn to Love It' section. Of course I had to test out the recipe. I ended up making it for Thanksgiving and it was a hit! Who wouldn't love brussels sprouts combined with cream and cheese? It's a great every day dish as well, a hearty side to any meat dish.

What's in it
1 lb brussels sprouts, stems and outer leaves removed
2 Tbl butter melted plus enough to butter dish
1 tsp salt
1 tsp red pepper flakes
1/2 C heavy cream
1/2 C grated white cheddar cheese
1/2 C bread crumbs

How it's made
Preheat oven to 400 degrees and butter a 2 quart baking dish. Bring a large pot of salted water to a boil, add the brussels sprouts and cook 8 minutes. Drain the brussels sprouts and coarsely chop.

Transfer brussels sprouts to baking dish and toss in the pepper flakes and salt to taste. Spread evenly and pour the cream on top. Sprinkle with the cheese and bread crumbs and drizzle butter on top. Bake until bubbly and golden brown, about 15-20 minutes.

Vegan Chocolate Cupcakes


My good friend Michelle just came back home from 3 months in South America (why do my friends always leave me?!!) and seeing as she is vegan, and hadn't had dessert in so many months, we had her over for American Dinner and vegan cupcakes. I didn't have a complete recipe, seeing as she is the one with 'Vegan Cupcakes Take Over the World', so I pieced something together from my 'Moosewood Desserts' cookbook. It's a take on their Six Minute Chocolate Cake recipe.

These cupcakes are a cinch to make, and incredibly delicious. Andy couldn't get enough of them. They are delicious on their own, but could easily be embellished to make a seasonal cupcake. I pondered putting crushed candy cane on top, but figured I'd go the purist route the first time around. I did decorate with some Pilsbury frosting I had laying around, piping it on to spell out words and silly decorations.
What's in the cupcakes
1 1/2 C unbleached flour
1/3 C cocoa powder
1 tsp baking soda
1/2 tsp salt
1 C sugar
1/2 C vegetable oil
1 C cold water or coffee
2 tsp vanilla extract
2 Tblsp apple cider vinegar


How the cupcakes are made
Preheat oven to 375 degrees. In a large bowl mix together all the dry ingredients, including the sugar, with a whisk. In a small bowl or measuring cup mix together all the rest of the ingredients except for the vinegar. Add wet ingredients to dry ingredients, then mix in vinegar into mixture with a whisk. The vinegar will react with the baking soda to make bubbles and a bit of foam. Spoon batter into cupcake tins lined with paper, filling 2/3 full. Bake for 20 minutes. Cool on rack when done. Prepare glaze as cupcakes bake. Makes 18 cupcakes.


What's in the glaze
4 ounces semi sweet chocolate chips (about 1/4 to 1/3 of a bag)
1/4 C hot water or coffee
1/2 tsp vanilla extract

How the glaze is made
In a double boiler (or a pot of 2 cups boiling water, with a larger metal bowl rested on top) melt chocolate, stirring often until melted and smooth. Remove from heat and stir in water and vanilla until combined and smooth. Spoon glaze over each cupcake (about 1 spoon per cupcake) and using the back of the spoon, spread glaze in a circular motion to cover the cupcake. Place in the refrigerator at least 20 minutes to harden the glaze. If putting crushed candy cane or chocolate chips, or mint UFO's on top, place before putting in fridge. If using frosting to pipe on decoration, do so after glaze is hardened.


December 1, 2010

Double Chocolate Peppermint Cookies

At the risk of sounding over dramatic, I will say it anyways: these are perhaps the best cookies I have ever made. Seriously. The most fascinating part is that one cookie is totally satisfying, they are that good. Usually one cookie follows another follows another, until you're stuck with a belly full of cookies. Of course I am also a sucker for chocolate and mint, being a huge fan of hot chocolate mixed with peppermint schnapps. These spirited little cookies have the perfect balance of chocolates and peppermint, walking a fine line between cookie and brownie - a good choice for any holiday party or dessert. The original recipe is courtesy of Bon Appetite magazine, but I have made a couple adaptations for the normal baker.

What's in it
2 1/2 C bittersweet chocolate chips (15 oz), divided
1 1/2 C unbleached flour
1/4 C unsweetened cocoa powder
1 tsp baking powder
1 tsp instant espresso powder (it's worth it!)
1/2 tsp salt (unless you are using salted butter)
1/2 C (1 stick) unsalted butter at room temperature
1 C sugar
1 tsp vanilla extract
1 tsp peppermint extract
2 eggs
4 candy canes coarsely crushed (they will be different sizes, that's ok)


How it's made
Preheat your oven to 375 degrees. Line two baking sheets with parchment paper or silicone baking mats.

Whisk flour, cocoa powder, baking powder, espresso powder and salt in a medium bowl. Set aside.

In a large bowl, beat butter until creamy. Beat in extracts and sugar until smooth. Add eggs and beat until combined. Set aside.

In a small metal bowl, measure out 2 cups chocolate chips, and place bowl over a small pot of boiling water (not a rolling boil, more like a simmer). Sir chips until smooth and melted. Measure 1/2 cup melted chocolate and set aside. If you keep it in a metal measuring cup, you can set on top of the oven to keep it warm as the oven pre heats.

Beat in remaining melted chocolate into butter mixture. Add the dry ingredients and mix until just blended. Stir in remaining 1/2 cup chocolate chips. (Ok, I added more than that...)

Using a tablespoon, scoop out small balls of dough and place on cookie sheet 1 1/2 inches apart. If you can shape them to be more round than blob, they will come out prettier when baked.

Bake cookies about 8 or 9 minutes, until they are cracked on top and tester comes out clean. Don't be fooled by the melty chocolate chips inside, though! Let set on baking sheet for a few minutes, then move to cooling racks. You can keep them on the parchment paper on top of the racks if you'd like, to minimize cleanup.

If necessary, re-warm reserved melted chocolate until melty. Using a fork, drizzle melted chocolate in zig zags across baked cookies. Sprinkle crushed candy on top, then drizzle with a bit more chocolate. Once all the cookies are baked and decorated, transfer onto one baking sheet and stick in the refrigerator to set the chocolate, about 20 minutes.

Tips
You should be able to get all the cookies on two baking sheets if they are a good size. If you need to use one twice, be sure it cools down in between, to minimize the dough melting and spreading out.

You can freeze these cookies up to three weeks in advance if you want to get a jump start on baking for the holidays. Freeze in an air tight container, and eat them cold or at room temperature, depending on your preference.

November 22, 2010

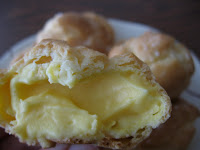
Cream Puffs


Cream puffs: They are rich, creamy and decadent, but also nicely portioned into snack size bites. Like I have said before, I would have never suspected that one could make cream puffs at home. Yet they are simple and fun to make! And pretty fancy looking, too.

I based the filling listed here on one I found on allrecipes.com. I went to the store looking for white chocolate pudding to use for the filling, but alas they had none. I went with French vanilla instead. It was nice, but I just found the white chocolate flavor on sale at Target, so I had to buy some to try these again. I think the almond (or other flavor) extract is an important addition. My guests were surprised to find out that the filling of these cream puffs was based on a pudding mix. The flavoring makes them seem more homemade.

When I make these again, I am going to try the filling without the whipping cream in the pudding (I'll just use milk). I liked them with it, but I also felt like I could only eat one or two since they were so rich. That being said, I also am looking forward to trying these filled with just whipped cream. I think I'd like the texture of the light and fluffy whipped cream filling in these tasty pastries.

Cream Puffs
Pate a Choux:
  • 8 ounces (or 1 cup) water
  • 4 ounces (or 1/2 cup or 1 stick) butter
  • 1/8 teaspoon salt
    Dough after incorporating the flour.
  • 1 tablespoon sugar
  • 1/2 teaspoon vanilla
  • 4 ounces (or a scant cup) flour
  • 8 ounces (or 4 large) eggs
  • Powdered sugar for dusting
  1. Preheat the oven to 425 degrees.
  2. In a small saucepan, bring the water, butter, salt, sugar and vanilla to a simmer over high heat. Reduce the heat to medium and add the flour. Sir quickly. The flour will absorb into the water to form a dough. Continue to stir for 1-2 minutes, to cook the flour and cook off some of the water.
  3. Remove the pan from the heat. Let the pate a choux cool slightly--you don't want the eggs to cook when you add them, but the choux should still be pretty warm. 
  4. Transfer dough to a a stand mixer (or use a bowl and an electric mixer). Add the eggs one at a time-- quickly stirring until each egg is fully incorporated before adding the next. It will seem at first that the eggs will not incorporate, but keep mixing until they do.
  5. On a baking sheet (lined with parchment for easier clean up), drop small (level-tablespoon sized) portions of dough spaced about 2 inches apart.
  6. Pre-filling puff.
  7. Bake for 10 minutes at 425 degrees. Turn the heat down to 350 degrees and cook about 20 minutes more, until they are a toasty, golden brown and are cooked all the way through. Cool on the pan or a cooling rack. (I've heard poking a hole in the sides of the puffs with a toothpick will help them from collapsing, but I've done it with and without this and never had a problem.)
Filling:
  • 2 (3.5 ounce) packages of instant vanilla or white chocolate pudding
  • 1 cup heavy cream
  • 2 cups of milk
  • 1/2 teaspoon almond or vanilla extract (or any other flavor extract that appeals to you--maple? Mint?!)
  1. Mix pudding, cream, milk and extract in a medium bowl. Pour into a large Ziplock bag and let it set for 15 minutes in the refrigerator. 
The Assembly:
Secret filling "door."
  1. When puffs are cool, take a sharp, serrated knife (like a steak knife) and cut little doors in the bottom. (See photo.)
  2. When the pudding is set, snip a tiny hole in the corner of the Ziplock bag. Holding the pastries upside down, squeeze the bag to fill the puffs with as much pudding as they can fit! They will take more filling than you think. When they are filled, close the doors back up. (Conversely, you can cut the top part off to fill the inside and turn them into little cream puff sandwiches.) Dust with powdered sugar and serve!

November 19, 2010

Von's Paella


Well, really, it's a paella recipe from Bob who owns a Huerta in Spain, passed along to Chris VonMarschall's family in the 70's. The handwritten copy of the recipe I have has the official title of "Pepe Laverua's Paella". Now, if you're anything like me, you may have viewed paella as a dish left for experts, or people with cash to drop on the special rice and threads of saffron. Not to mention the special pan. I was always down right intimidated, until Von showed me the light by gifting a bag of paella rice to me for my birthday, and coming over to make it with me at my house last week, with friends.

Paella not only is an incredibly delicious dish, but it is actually not that expensive to make, after the initial investment in the pan. It also is a very flexible dish to make, leaving room for creativity in ingredients and preparation. As I stand here in my kitchen making my second batch of paella, ever, I could see how it would be very difficult to make the same paella dish twice. Ngoc also posted a recipe for paella two years ago, and I know it is delicious from personal experience.

Paella is also a very communal dish, seeing as how any batch of paella made in a standard paella pan feeds at least 6 people. Last week we had six friends help make it, and each person brought ingredients. Cooking it together was fun, and sitting around the table serving dinner from a huge pan of paella felt like the ultimate family style dinner. Don't forget the aprons, as it can get a little messy.

Now a word about the equipment and ingredients. If you don't have a paella pan, you can get one fairly cheap at Sur La Table. If you live in the Berkeley area, pick one up at the new restaurant supply store on 7th and Potter, you can get one for $15 or $20. Regarding the rice, do not buy anything less than a traditional paella rice (in other words: no long grained rice). Saffron you can pick up pretty cheap at TJ's or bulk in a natural grocery. Just buy enough for one use, and it will be fresh and less expensive. Any combination of meat and veggies can go in your paella, use what you have on hand. I do not specify quantity of vegetables and meat because it depends on how many people you have and how big your pan is. A proper paella will end with the pan filled to the brim with goodness. For a standard 6 serving pan, at least 2 bell peppers, 2-3 chicken breasts, 4-6 sausages, a couple cans of artichoke hearts...you get the idea. Below are suggested ingredients, but be creative and experiment, it's half the fun!


What's in it
paella rice or arborio rice
minimum onion whole onion, sliced in large wedges
head of garlic, broken into cloves, skin left on
few tomatoes, cut in large wedges
lots of olive oil
lots of salt
white cooking wine
beef or vegetable stock
2 T paprika
1 T saffron
1 T red chili pepper flakes
hot sauce (optional)
1 lemon, sliced
1 jar roasted bell peppers (pimiento)
meat options: large stew sized chunks of chicken or beef or pork, uncooked italian sausage
seafood options: whole shrimp, clams, langostinas (baby lobster tails, frozen at TJ's)
vegetable options: bell peppers, green beans, mushrooms, peas, cauliflower, artichoke hearts, olives, whatever!


How it's made
Start by heating up your paella pan on your stove top (or outdoor grill), covering the bottom 2/3 with oil. Once oil is hot, stir in salt and dissolve in oil. Add pork/beef and brown in the oil. Add chicken/sausage and brown. Pour in wine to cook meat in. After wine comes to a simmer, add in the onions and add your long cooking vegetables (bell peppers, etc). Stir in garlic cloves. Bring back to a simmer and cook until veggies are tender. Add in the rest of the vegetables and cook a bit longer. Add in wine or stock as needed. Toss in 2 handfuls of rice per person (think of how large your pan is) scattered around the pan. Stir rice in and cook on high heat to 'brown' the rice, stirring often. Add in all spices except saffron. Add enough stock/wine to cover all ingredients and simmer, stirring often. After a bit add in the saffron. Stir in the shrimp/langostinas about 5 minutes before done. Cook until rice is tender and paella is no longer soupy. Put clams/mussels on top, and garnish the top with sliced lemon and pimiento peppers. Cook in the oven at 400 degrees to carmelize the top, for about 10 minutes, until seafood is cooked. Let stand about 10 minutes to rest before serving. Enjoy!


November 16, 2010

Easy Croutons


Who knew croutons were so easy to make? Ok, you probably did, and in the back of my mind I acknowledged this fact on some level. It's just so easy to pick up a small bag of over priced and rock hard croutons at the store. Never again. Especially since croutons are fantastic on soups and salads, and a great way to turn that baseball bat of a baguette into something delicious.

What's in it
4-5 C stale or fresh bread of any sorts, cubed (or baguette thinly sliced)
2 T olive oil (high quality, and flavored if you wish)
2 T butter
1 clove garlic, minced
italian spices, or any spices (dill, thyme, curry...)

How it's made
Pre heat oven to 400 degrees.
Put butter, oil, garlic and spices in a microwave proof bowl and microwave 30 seconds to melt butter (or use a stove and pot). Stir to combine. Toss cubed bread in mixture, to coat.

Spread bread onto a baking sheet, and bake for 8-10 minutes, until golden brown.

Enjoy on top of soups or salads!

November 15, 2010

Perfect Pork Chops

My Grandma makes really yummy pork chops, I remember them from when I was very little. They featured catsup and a slice of lemon on top. This recipe is far from my childhood pork chop dinners. It comes from Alton Brown's recipe, and it features a coffee and molasses marinade (brine). The brining process brings out the flavor, and ensures the chops will not dry out. These pork chops served with the au jus from the marinade, and homemade applesauce, is simply divine. The chops and sauce are amazing on their own, but together they equal more than the sum of their parts. If you're looking for an alternative to a standard chicken dish, this is a simple yet delicious option.

What's in it
2 pork chops (1 inch thick)
1/4 C molasses
1 C strong coffee, cooled (pour through grinds twice)
2 T apple cider vinegar
dash of dijon mustard
dash of freshly ground pepper
1 tsp salt
couple sprigs of fresh thyme, or pinch of dried
2 cloves of garlic, minced
dash of ground ginger

How it's made
Place all ingredients together in a re-sealable bag or ceramic baking dish with lid, and marinade overnight or at least 2 hours. Be sure liquid covers the meat.
After the initial marinade, this dish comes together quickly, so first take time to get the applesauce simmering, and any other side dishes you might want to serve.
When you are ready, about 20-30 minutes before eating time, place the chops on a plate, and pour the liquid into a small stock pot. Simmer the marinade on very low heat, stirring occasionally, until reduced to about 1/4 C liquid. Keep an eye so it doesn't boil over.

After the marinade starts simmering, fire up your cast iron grill (or George Foreman or outdoor grill) and preheat. Be sure to coat with oil. Once the grill is heated, cook the chops for about 5 minutes on each side (don't move them around unless you want fancy marks). Chops are done when internal temperature registers 145 degrees. Finish in the oven for a couple minutes if necessary. Remove from heat and let rest 5 minutes before serving. Take time to strain the marinade reduction, and mash the apples for the sauce.

Serve chops with reduction and applesauce on the side. Enjoy with a glass of Navarro Dry Gewurztraminer. We had Butternut Squash Soup as a first dish, using apples in the soup as well, and it was a delicious prelude to the main dish.

November 9, 2010

Brussels Sprouts with Pecans and Onions


Maybe it's because I came late to brussels sprouts, but I can't get enough of them. Maybe I am making up for lost time.

For those of you who don't understand where I am coming from, I'm sure that there is a way to cook brussels sprouts so that they don't taste good. Probably it was the way your parents prepared them for you when you were little. Maybe you hated them. I say, fair enough. Those brussels sprouts very well could have been nasty. I'm not going to tell you they weren't.

But I am going to tell you that, cooked properly, brussels sprouts are simply phenomenal. I like roasted brussels sprouts so much that I even like them cold, as left overs from the night before. Now, that is not necessarily the ideal way to enjoy these nutritious veggies, but I'm just saying that are THAT good.
(On a side note, why are brussels sprouts so unfairly maligned in popular culture?)

Normally, I follow Amber's recipe: a simple toss-with-olive-oil-and-roast preparation. I love it. The roasting imparts a mellow, nutty flavor and caramelizes the edges into a perfect crunchy sweetness. I don't know why I wanted to try another recipe for brussels sprouts last night, since I am so satisfied with the first, but I decided to get crazy. Maybe it was the pecans. Or the onions.

I do know that I couldn't get rid of the roasting, so I adapted this recipe from Saveur (the best food magazine in existence--and also wonderful to follow on facebook, by the way) to accommodate the roasting process.  This recipe is slightly different than the plain roasting method, but I don't want to say it is better. The pecans and onions compliment the brussels sprouts nicely and make this a particularly great dish for cold fall and winter nights. It kind of gussies them up a little. I'm going to add this into my regular brussels sprouts rotation, because I do love a little variety in my life. Even if it's just in my brussels sprouts.

Brussels Sprouts with Pecans and Onions
  • 1/4 cup of toasted pecans
  • 1 pound of brussels sprouts
  • Olive oil (just enough to coat the Brussels sprouts...but the more the tastier)
  • Salt and pepper to taste
    As you can see, we added a bit more onion...
  • 1 tablespoon butter (or olive oil)
  • 1/2 of a medium white onion
  • 1 or 2 cloves of garlic
  1. Heat oven to 425 degrees. Chop and toast the pecans on a baking sheet in a single layer for 3 to 4 minutes, until they are fragrant and browned.
  2. Meanwhile, chop brussels sprouts in half. In a large bowl, toss brussels sprouts with olive oil, salt and pepper. Roast in the oven for 15-20 minutes, until they are as browned as you like. (I like mine on the crispier side.)
  3. While the brussels sprouts are almost done roasting, heat a large pan over medium-high heat. Chop your onion. Add butter or olive oil to the skillet and let it melt. Add onion and stir to coat. Mince the garlic and add it to the pan. Sautée until the onions are golden, about 5 minutes. Stir in roasted brussels sprouts and cook for a couple minutes more. Stir in pecans and adjust salt and pepper to taste.
Serves 2-4

    November 4, 2010

    Banana, Pecan, Oatmeal Chocolate Chip Cookies


    These cookies are the soft and cake-y fantasticness you would get if you combined all of the good things about banana bread with all of the good things about chocolate chip cookies. That may not immediately sound like a good idea, but it truly is.

    The first time I had these, I was shocked at what a good combination these ingredients made. They are not too sweet and not too dense. The original recipe comes from--where else--Martha Stewart's Cookies. Martha has done it again!

    I have slightly adapted the recipe over the last few years. This is now my go-to cookie recipe. It is easy and just unusual enough to be exciting. I've received nothing but stellar feedback on these cookies, so I was very surprised to realize that I have not yet posted the recipe for you! I am sorry for holding out this long. You'll just have to make a double batch of these right away to make up for lost time.

    Banana, Pecan, Oatmeal Chocolate Chip Cookies
    • 1 cup white flour
    • 1/2 cup whole wheat flour
    • 1 teaspoon Kosher salt
    • 1/2 teaspoon baking soda
    • 3/4 cup (or 1 1/2 sticks) unsalted butter, room temperature
    • 1/2 cup granulated sugar
    • 1/2 cup packed brown sugar
    • 1 large egg
    • 1 1/2 teaspoon vanilla extract
    • 1 large plus one small over-ripe banana*
    • 1/4 teaspoon cinnamon
    • 1 cup rolled oats
    • 8 ounces semi-sweet chocolate chips (or a mixture of semi- and bittersweet chips!)
    • 1/2 cup coarsely chopped toasted pecans
    1. Preheat oven to 375 degrees. In a medium bowl, whisk both flours with salt and baking soda.
    2. Chop pecans and toast in the  oven for a few minutes until they are fragrant and golden brown, about 5 minutes. (Check frequently to avoid burning.)
    3. Meanwhile, put butter and both sugars in a large bowl. Mix with an electric or stand mixer on medium until pale and fluffy, about 2-4 minutes.  Reduce speed to low. Add egg and vanilla and mix until combined. 
    4. Add 1/4 teaspoon cinnamon to banana and mash, until no large pieces remain. Add banana mixture to batter, beat on low speed to combine.
    5. Add flour mixture. Mix until just combined. Stir in oats, chocolate chunks and toasted pecans.
    6. Drop dough onto parchment paper-lined cookie sheets, spacing 2 inches apart. Back cookies, rotating half-way through for 12-13 minutes. Cookies should be golden brown and just set. Let cookies cool on sheets on wire rack for 5 minutes then transfer to the racks to cool completely.
    Makes 2 and a half to 3 dozen cookies.
    *Once bananas are past their prime, I store them in a bag in my freezer until I am ready to make banana bread, muffins, or these cookies. Just thaw in the microwave before using.

    October 22, 2010

    Halloween Brownies


    Every Halloween Party needs a batch of Halloween Brownies.

    Here's my version:

    Mix up a batch of Moosewood Fudge Brownie batter, pour into greased baking pan, then sprinkle the top with Reeses Pieces. Bake as directed. Added bonus- ET would be proud.


    October 21, 2010

    Graham Cracker Pie Crust


    Now that I know how to make the filling for sweet potato pie and pumpkin pie from scratch (and hopefully you do, too!), it's time to step it up and make the crust from scratch as well. Putting that homemade filling in a generic pie tin crust just feels like a cop-out. Plus, you run the risk of people thinking you bought the whole thing from a bakery. The great benefit of the graham cracker crust is it is a breeze to make, and no rolling pin is needed!

    What's in it:
    1 plastic sealed package graham crackers (about 10 crackers)
    6 Tbl butter, melted
    1/4 C sugar
    tsp cinnamon (optional)

    How it's made:
    Pre-heat oven to 375 degrees. Smash up the crackers before you open the package (it's pretty fun) and then dump the crumbs in a food processor. Pulse until the consistency is a fine crumb. Add in sugar and cinnamon and pulse to mix. Add in melted butter and pulse until thoroughly distributed, and you have a nice even consistency. Press the cracker crumbs into a 9" pie pan, evenly distributing the layer. If you do not have a food processor, you can do all this by hand in a bowl with any pounding and mixing utensil you would like to use (such as a muddler or rolling pin, etc).

    Bake in oven 7-10 minutes, and cool. If recipe calls for an uncooked pie crust, chill in the fridge an hour before filling.

    Enjoy!

    October 18, 2010

    Lentil, Barley and Sausage Soup

    Lentil and Barley Soup with Sausage
    It's turning out to be quite a nice fall here in Portland, Oregon. (Hopefully I'm not speaking too soon.) For at least the last week, we've had gorgeous, crisp cool sunny days. Perfect fall weather if you ask me. The forecast for this week indicates we'll get more of the same. I certainly hope we do. It's my favorite time of year.

    While I still can't believe it is already mid-October, I am definitely beginning to get excited about all the wonderful things that fall entails. Leaves are changing, temperatures are dropping, pumpkins are out on porches. One of the things I'm looking forward to is making soup. There is something so essential and satisfying about a good soup! And the truly fantastic thing about soups is they are so easy to make. They are so malleable. Be creative, get crazy---design a soup as you go. It is only recently that I realized that one really doesn't need a recipe for a soup, just a basic idea and whatever contents of your fridge and pantry that you are craving.

    Soup after a long day at work.
    That being said, I'm posting this soup recipe. I came up with this recipe by combining and tweaking a couple of recipes I've clipped from food magazines. I will always, always associate lentil soup with my mother. Lucky for me, she made fantastic lentil (and many, many other kinds of) soup. But, this version is a bit different than hers. It's a lentil soup with barley, and like any good lentil soup it is very hearty. It begs for a good chunk of crusty bread and a cold night. A little wine certainly doesn't hurt.

    One of the best thing about soups, too, is that they just get better with time. Make a large batch and savor the left-overs for lunch the next day or freeze some to enjoy later.

    Let the soup season commence!

    Lentil and Barley Soup with Sausage
    ~Print Recipe~
    • 2 tablespoons olive oil, separated (or more to taste)
    • 2 sausage links, cut into small pieces
    • 1 leek, chopped
    • 1 large onion, chopped
    • 2 teaspoons garlic, minced
    • 1 cup carrots (or more), chopped
    • 1 cup celery (or more), chopped
    • 2 red potatoes, chopped
    • Salt and pepper to taste
    • 2 bay leaves
    • 1/4 teaspoon dill
    • 2 1/2 teaspoons Italian seasoning
    • OR since I discovered I was out of Italian seasoning, I substituted the following:
    • 1/2 teaspoon each of oregano, thyme, basil, rosemary (or more to taste)
    • 2 to 3 courts low-sodium chicken stock (or water)
    • 1/2 cup uncooked pearl barley
    • 2 cups uncooked lentils
    • 2 tablespoons dry red wine (optional)
    • 2 tablespoons lemon juice (optional)
    • 1 1/2 tablespoons brown sugar (optional)
    • 1 tablespoon red wine vinegar (optional)
    • Fresh cracked pepper and grated cheese to garnish
    1. Heat 1 tablespoon oil over medium high in a Dutch oven or large soup pot. Add the sausage and cook until browned. Drain the sausage and remove from pot, set aside.  Add remaining oil and chopped leek. Stir to coat. 
    2. As the leek is sauteing, chop and stir in the onion. Chopping and adding as you go, add all the ingredients through the potatoes, continuing to stir frequently. Add the spices. Cook for a few minutes until the vegetables are softened and the onion is translucent.
    3. Add the barley and stir to incorporate. Add the chicken stock. Bring to a boil, then reduce heat and simmer for 15 minutes.
    4. Stir in lentils. Cover and cook for 30 minutes, or until lentils are soft and vegetables are cooked through.
    5. Add the cooked sausage (and optional ingredients, if using) and simmer for another 10 minutes, until the sausage is warmed and flavors have mingled. Adjust spices as necessary.
    6. Top individual servings of soup with more fresh cracked pepper and grated cheese of your choice. Serve with crusty bread.

    October 14, 2010

    Pate a Choux

    Cinnamon-and-sugar-dusted pate a choux puffs.
    Pate a choux. First of all, the word just looks fancy. (Well, it definitely does if you have all the proper accents, but I'm sadly not aware of how to render them on my computer.) Say it--it surely sounds fancy. It even tastes fancy. Why, then, is pate a choux so easy to make?

    I first came across this recipe in Michael Ruhlman's book Ratio. I was struck by the way he described it: "Choux paste can be made start to finish using a saucepan and a sturdy wooden spoon," though he recommends a stand mixer for a better puff. "Either way," he continues, "the water takes longer to boil than it does for you to actually make the choux paste, so there's no excuse for not making pate a choux preparations at home."

    That there is no excuse becomes even more obvious when you realize that once you have your choux paste, you can make eclairs, cream puffs, profiteroles, churros, gougeres, even gnocchi and more. In the book, Ruhlman gives a general ratio for each basic recipe, whether it's pancake batter, bread, or mayonaise. Working from that ratio, you can easily scale the recipe for how many servings you want AND, my favorite part, tailor the recipe to fit your taste.

    You can fill the airy inside of the puffs with cream or ice cream!
    Ruhlman also gives you tons of ideas of how to adapt the basic recipe. I like the idea of knowing what exactly makes a muffin a muffin, so that I can tweak that muffin recipe however I so desire. There is a great freedom in that knowledge. I think most professional and advanced cooks have this understanding of ratios within them. And now, with this handy book, we all can work from that place.

    I think it's all very exciting---especially the pate a choux. I've been thinking about it since I first read the recipe months ago. I finally got around to making it last night and it certainly is easy. I wanted something quick, so I made the basic sweet preparation and dipped the dough in cinnamon-sugar before baking. This was my cheater version of churros. Cutting corners has never tasted so delicious.

    Now that I've familiarized myself with the basic prep, I'm dying to make gougeres (cheese puffs), cream puffs or profiteroles. I can't wait to knock the socks off some dinner guests with a fancy dessert that really was a cinch to make. Next time I'm definitely taking it to a higher level.

    Ruhlman's basic ratio for pate a choux is 2 parts water: 1 part butter: 1 part flour: 2 parts egg. That translates to:

    Sweet Pate a Choux
    • 8 ounces (or 1 cup) water
    • 4 ounces (or 1/2 cup or 1 stick) butter
    • 1/8 teaspoon salt*
    • 1 tablespoon sugar*
    • 4 ounces (or a very scant cup) flour
    • 8 ounces (or 4 large) eggs
    Dough after incorporating the flour.
    1. Preheat the oven to 425 degrees.
    2. In a small saucepan, bring the water, butter, salt and sugar to a simmer over high heat. Reduce the heat to medium and add the flour. Sir quickly. The flour will absorb into the water to form a dough. Continue to stir for 1-2 minutes, to cook the flour and cook off some of the water.
    3. Remove the pan from the heat. Let the pate a choux cool slightly--we don't want the eggs to cook when we add them, though the choux should still be pretty warm. 
    4. Add the eggs one at a time-- quickly stirring until each egg is fully incorporated before adding the next. It will seem at first that the eggs will not incorporate, but keep mixing until they do. You can do this in the saucepan, or you can transfer to the bowl of a stand mixer fitted with a paddle attachment. (The last method results in more dishes to wash, but will produce a superior rise in the pastries.)
    5. On a baking sheet (lined with parchment for easier clean up), drop small (tablespoon to golf ball-sized) portions of dough spaced about 2 inches apart. I rolled the balls in cinnamon-sugar, but if you are making profriteroles or cream puffs, you may not want to do that.
    6. Bake for 10 minutes in your preheated 425 degree oven. Turn the heat down to 350 degrees and cook 15-20 minutes more, until they are a toasty, golden brown and are cooked all the way through. Cool on the pan or a cooling rack and serve room temp (or chilled and filled with ice cream!) 
    Makes 20-24 puffs, or about 8 servings
     *For savory pate a choux, increase the salt to 1/2 teaspoon and skip the sugar.

    October 3, 2010

    Spicy Caramel Corn

    Salty, spicy sweet caramel corn with cayenne and cashews.

    I watched a kid eating some of this caramel corn last night. An adult nearby was also having some. She warned the boy that it was a little spicy. After taking a couple mouthfuls, he told her no it wasn't. (At first, it is rich, buttery-caramely sweet.) She said that it was spicy you just had to give it a second. He had some more and adamantly told her no, no, it really wasn't spicy at all.

    About 30 seconds into the conversation, he yelled, "Whoa! It got spicy!" And then he stopped eating the caramel corn. The adult just raised her eyebrows and continued to munch away. It was pretty funny.

    I've made this recipe twice. Last night and last December. Somehow the batch from last December was better. I think it had to do with how long I let the caramel cook and the quality of my cayenne. For last night's batch, I was kind of in a hurry and I don't think I let the caramel caramelize long enough. The batch was still quite good, but it was not as memorable as I thought it should be.

    The interesting thing about this recipe is, of course, the cayenne. There is something genius about taking regular, cloyingly sweet caramel corn and making it a little spicy. It is addicting. The spice level of your caramel corn will depend on your cayenne. Cayenne's spice level varies depending on how fresh it is. If you are anything like me, you don't know how old your cayenne is--it just seems like it's always been there on the spice shelf. I added 1/2 teaspoon of cayenne to this most recent batch and it was just on this side of underwhelming.  Adjust your cayenne level depending on how spicy you like your snacks and how fresh your cayenne is.

    Like many of my favorite recipes, I owe this one to Smitten Kitchen. Why does she always have the best recipes? I don't know how she does it.

    Spicy Caramel Corn
    • Nonstick cooking spray
    • 3 tablespoons olive oil or vegetable oil (feel free to use less!)
    • 1/2 cup popcorn kernels
    • 2 cups salted cashews or peanuts (optional)
    • 1 1/2 teaspoons baking soda
    • 1/4 to 3/4 teaspoons cayenne
    • 3 cups sugar
    • 3 tablespoons unsalted butter
    • 1 to 1 1/2 teaspoons kosher salt (depending on how salty you like it)
    1. Lightly coat 2 large heatproof spatulas, a very large mixing bowl (or 2 medium large bowls) and 2 baking sheets with nonstick spray. (I used parchment in addition to the spray on my baking sheets.)
    2. Heat oil over medium high heat in a large pot with a lid. Add the popcorn kernels, cover, and shake the pot until kernels are coated in oil. As the popcorn pops, shake the pot to keep from burning. Transfer all fully popped popcorn to prepared bowl, leaving any un-popped kernels in the pot. Toss popcorn with nuts (optional).
    3. In a very small bowl, stir baking soda and cayenne together.
    4. In a large saucepan, combine the sugar, butter, salt and 1/2 cup water. Cook over high heat, without stirring, for 10-14 minutes until the mixture is a golden yellow caramel.
    5. With baking sheets at the ready, remove the caramel from the heat. Whisk in the baking soda and cayenne. The mixture will bubble up some!
    6. Quickly pour the caramel over the popcorn and use the prepared spatulas to mix the caramel and popcorn/nuts until well coated.
    7. Quickly spread the popcorn on your baking sheets, separating any big clumps. Cool to room temperature to serve. 
    *I actually like this caramel corn best the next day. The texture improves! Good luck saving any, though, it goes fast.