Showing posts with label quick. Show all posts

August 20, 2011

Chocolate Covered Pretzels, Wedding Edition

There is something about this combination that gets me every time. White chocolate is my favorite, because the chocolate is so sweet next to the salty crunch of the pretzel. Semi-sweet and milk chocolate work great, too, though.

Of course, the sprinkles are not essential, but they do make things a lot more festive with just a few easy shakes. Worth it, I'd say.

We made probably 130 or so chocolate covered pretzels to serve with the other desserts at my wedding. It seemed like an easy enough task--I mean you just dip the pretzels in chocolate and cool. But, 130 pretzels is really quite a few. We had three people working on this and had to call in reinforcements, because we weren't moving quickly enough.

It all came together, though, and these were really a hit!

Chocolate Covered Pretzels
  • 1 bag of chocolate chips--either white, milk or semi-sweet depending on your preference
  • 2 bags pretzel rods
  • Sprinkles, optional
  1. Line a baking sheet with wax paper or parchment paper. Pour as many chocolate chips as will fit into a small microwave-safe bowl. Microwave for about a minute, stirring as needed. Continue to microwave in 10-15 second increments, stirring in between, until the chocolate  is completely melted. 
  2. Hold pretzel rod vertically over the bowl and spoon melted chocolate evenly over the entire pretzel, leaving just enough uncovered to serve as a handle. Let the excess chocolate drip off.
  3. Hold the chocolate covered pretzel over a plate and cover evenly with sprinkles. Set on the prepared baking sheet to cool. Place the full baking sheet in the refrigerator for a few minutes to harden, making them easier to store. (Serve at room temperature.)
  4. If the chocolate in your bowl gets to hard, microwave it for a few seconds until it is melted again. Add more chocolate chips to your bowl and repeat step one as necessary.

July 5, 2011

Pesto

There was a time in my life when I refused to eat pasta with "red sauce." I would only eat pasta with pesto. While I have become much less picky about my pasta sauces as I've, um,... matured, I still think pesto is delicious. I would eat it with a spoon if I could get away with it.

Pesto is usually quite expensive to buy at the grocery store. As you can imagine, I've often entertained the idea of making my own. The problem is that it is also expensive to make. Pine nuts are expensive. Basil can be expensive. Good olive oil is expensive. Good Parmesan is expensive. It can add up. And while not exactly cheap, pesto is less expensive to buy at Costco than to make from scratch. Or so I have told myself.

So, all my good intentions of making my own pesto over the last couple of years have been thwarted. Until now. I have recently found out that you can make pesto with nearly any kind of nut--not just pine nuts. Break through! I usually have pecans and other nuts on hand, so that is no extra cost. I used a pecan and walnut combo in this version, but feel free to substitute whatever kind of nut you have available. I have heard that almond pesto is also very good.

Also, it is prime basil season out there, at least up here in Portland. I was at the farmer's market and I could not get away from the sweet, herb-y smell of fresh basil. One stand was selling three bunches of basil for $5. (The equivalent of at least 5 cups of basil leaves.) I couldn't resist--especially because I just happened to have some Parmesan in the fridge. I was pesto ready and I couldn't deny it any longer.

I first tried to use the Magic Bullet that I had recently received as a gift, but no dice. I whipped out my mini-food processor and turned my basil into pesto in no time. This is an easy and quick recipe that is very flexible. I tried to use as little olive oil as possible, since I find the store-bought kind too greasy. That is the added benefit of making your own--you get to make it precisely the way you like it.

I used a cup of this freshly made pesto to make a pesto potato salad for a Fourth of July barbecue, which I will post shortly. I have a ton of pesto left, too, so I see some pesto pasta in my near future. For the quantity of pesto this makes, it definitely ended up being cheaper than buying it at the grocery store in the end.  Worth it, for sure.

Happy summer!

Pesto
  • 4 cups packed fresh basil leaves, washed and dried
  • 2/3 cup to 1 1/2 cup olive oil, depending on your preference (use olive oil that tastes good on it's own)
  • 1 cup toasted nuts, chopped (walnuts, pecans, almonds, pine nuts)
  • 5 or more cloves of garlic, or more to taste
  • 1 cup grated Parmesan
  • 1 teaspoon salt, or more to taste
  1. Put basil, olive oil, nuts and garlic and salt in food processor.
  2. Blend until combined
  3. Add Parmesan and blend for a few seconds until incorporated.
Makes at least 2 cups. You can easily half this recipe for a smaller batch.
To store: cover with surface completely with plastic wrap and refrigerate for up to a week.

May 27, 2011

Blue Cheese Scallion Biscuits

 There must have been a time when I did not like blue cheese, but if there was I cannot remember it. The ripely pungent, extremely boldly flavored moldy cheese doesn't seem like it would appeal to young children and I admit that it is something of an acquired taste. Yet I only know that the first time I remember eating blue cheese--smeared on crostini with roasted garlic--I couldn't get enough.

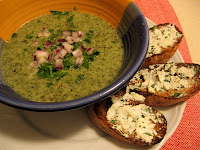
Blue cheese is good in salads, in mac n' cheese, on crackers--well, when isn't blue cheese a good idea? Now I know that it is also fantastic in these biscuits from Smitten Kitchen. The salty, savory flavor of blue cheese really shines in these craggy drop biscuits, but is not over powering. I served these biscuits with a subtly spiced roasted red pepper soup, but they would be a great accent to any dish that could use a hint of blue cheese. These are so quick and easy you can throw them in the oven right before you serve dinner. You will not regret it.

What a second, did I just say BISCUITS? Savory, cheesy biscuits?! So fluffy, so flaky, so rich and toasty!  Honestly, who doesn't love biscuits?!  I love them a bit too much, so I must very intentionally limit my biscuit making or things would very easily get out of hand. (And by things, I mean my girth.) Luckily, I had some friends over for dinner who love biscuits maybe even more than I do. They took the remaining biscuits safely out of my reach. (My scale and I thank you, D & K.)

One year ago: homemade tortilla chips, guacamole
Two years ago: chocolate cream cheese cupcakes, easy d.i.y. sushi
Other blue cheese recipes: roasted pear salad with blue cheese and walnutsstuffed burgers

Blue Cheese Scallion Biscuits
  • 2 1/4 cups all purpose flour
  • 2 1/2 teaspoons baking powder
  • 2 teaspoons sugar
  • 3/4 teaspoon baking soda
  • 1 teaspoon salt
  • 6 tablespoons (3/4 of a stick) cold, unsalted butter cut into 1/2-inch cubes
  • 1 1/2 cups crumbled blue cheese
  • 4 scallions, finely chopped
  • 1 cup well-shaken buttermilk
  1. Preheat oven to 450 degrees. Line a baking sheet with parchment.
  2. Whisk together flour, baking powder, sugar, baking soda and salt in a large bowl. Use a pastry cutter or your hands to blend in the butter until the mixture resembles a coarse meal. Stir in blue cheese and scallions. Add buttermilk and stir until just combined. 
  3. Drop dough in 12 equal portions about 2 inches apart onto prepared baking sheet. Bake in the middle of the oven until golden, 16 to 20 minutes.
Makes 12 biscuits

April 3, 2011

Easy Salad Dressing

I needed a salad to bring to a dinner party. The main course was clam chowder, so I wanted something light for the salad dressing. I love clam chowder,  but I didn't want the whole dinner to be too rich and creamy. I found a quick, easy and "bright" dressing online and made minor adjustments. Lemon juice replaces vinegar in this dressing which makes it just different enough than a vinaigrette to keep things nice and interesting. The garlic adds a great depth of flavor. (If you are not into garlic, substitute with something you like and post the variation in the comments!) The salad was a hit!

Lemon, Garlic and Olive Oil Dressing
  • 1/2 cup extra virgin olive oil
  • 1 cup freshly squeezed lemon juice
  • 3 cloves of garlic, minced or pressed (more or less to taste)
  • 1/2 tsp freshly ground black pepper (or more to taste)
  • 2 tsp salt
  1. Add all ingredients to a container with a tightly sealing lid.
  2. Shake contents vigorously until the oil is well-incorporated, about 1 minute.
  3. Drizzle over salad and toss to coat.
This recipe makes a large batch. Store remaining dressing in the refrigerator.

November 15, 2009

Goat Cheese Crostini


These are so simple and yet so incredibly flavorful and delicious! The creamy tang of the goat cheese and the sharp, savory bite of the garlic. The freshness of the parsley. We paired these with a mild potato soup and these were the standouts. We had a few left over and we figured they wouldn't necessarily store well, so we had the remainders for dessert.

These crostini are not particularly ground breaking, and yet I never would have thought to combine these flavors just so. I combine a few techniques I've gleaned from various sources here, but the cheese spread is actually from Meals in Minutes, a Weight Watchers cookbook. Who knew they'd have anything to add? Well, try these and you will see that they certainly do.


Goat Cheese Crostini

  • 1 baguette
  • 2 cloves of garlic
  • Olive oil for brushing (of olive oil spray)
  • Salt, pepper, thyme, other seasonings to taste
  • 1/4 cup goat cheese
  • 1/8 teaspoon freshly ground black pepper (or more to taste)
  • 1 tablespoon chopped flat leaf parsley
  • 1 teaspoon olive oil
  1. Preheat broiler. Slice baguette on a bias into pieces 1/2 inch thick. Lay slices in a single layer on a baking sheet. Chop 1 clove of garlic in half. Rub the cut edge on the top side of baguette slices. Spread a thin layer of olive oil on slices with a pastry brush, or spray slices well with an olive oil spray. Sprinkle with salt, pepper and other seasonings to taste.
  2. Toast slices under broiler for 1-2 minutes until crispy and golden. (They will burn really quickly if you don't keep a close eye on them.)
  3. In a small bowl, combine goat cheese, pepper and parsley. Press in the remaining garlic clove with a garlic press (one of the best tools ever!) and add the oil. Mix until smooth. Spread on the baguette slices. Pop them back under the broiler for 1 minute to lightly melt the cheese mixture. Serve immediately.

March 15, 2009

Roasted Brussel Sprouts


According to Mollie Katzen, these are the brussel sprouts that will convert any non-lovers of brussel sprouts. I put it to the test, and promptly converted Mary Ann, although her disclaimer was she would only eat them if they were prepared like so. My next test case will be the hardest - Andy Zoo. Not only is this recipe incredibly easy, but super delicious as well!


What's in it
Brussel Sprouts, cut in half (as many as you like)
Olive Oil
Salt

How it's made
Preheat your oven to 450 degrees. Line a baking pan with foil and treat with the olive oil so there is a thin coating all over the foil. Place all the brussel sprouts cut side down on the tray, and smear them around so they get coated with oil on the bottom.

Once oven is preheated, bake for ten minutes, then shuffle the sprouts around again to get them coated with more oil. Bake five minutes more or until done to your liking. They will continue to cook a bit once you take them out, since they will be so hot. When removed from oven, sprinkle with ground sea salt if you like. Prepare to love them, then eat them!

March 12, 2009

Spicy Eggplant Stir Fry

A few days ago, I was really craving eggplant--it's so rich and melt-in-your-mouth delicious. I searched the internet for a recipe that looked easy and that didn't smother the eggplant in cheese. I found a stir-fry type recipe at allrecipes.com that got some rave reviews. The nice thing about that website is that if a dish is good, people will leave comments saying so--no guess work. They also put tips they used (or should have used) to make the dish even better. I usually take the recipe and the user comments and then add to it or tweak it to suit my taste or on-hand ingredients. I've been consistently satisfied with the results.
Spicy Eggplant Stir Fry
  • 2 tablespoons vegetable or olive oil 
  • 2 long Chinese eggplants, cubed (I went to Safeway and could only find the plump regular kind, so I went with that)
  • 1 onion chopped into bite-sized chunks
  • 1 tablespoon minced garlic
  • 1 red bell pepper, chopped into bite-sized chunks
  • Any other veggies you want
  • 4 1/2 tablespoons soy sauce/tamari
  • 3 tablespoons red wine vinegar
  • 1 green chili pepper (as spicy as you desire), finely chopped
  • 3 tablespoons white sugar
  • 3 teaspoons corn starch
  • 1 1/2 teaspoons chili oil (you can substitute chili sauce, red pepper flakes, etc for some heat)
  • Salt to taste
  1. Heat vegetable oil in a large skillet over medium high heat. Add onion and saute for a couple of minutes. Add minced garlic and other veggies and saute until cooked--the eggplant will become tender and start to brown in 5-10 minutes.
  2. Meanwhile, prepare the sauce. In a small bowl, mix soy sauce, red wine vinegar, chili pepper, sugar, corn starch and chili oil.
  3. Add sauce to the stir fry, stir to coat evenly and cook until the sauce thickens.
  4. Serve with rice.
*Many comments suggested adding pork or chicken to this dish. One of the nice things about this recipe is you can pretty much add or subtract anything you like. People tried it with potatoes, green onions, fish sauce, Sriracha, cashews--you name it.
*The sauce originally called for 1/3 the amounts shown here, but all of the comments said to make more sauce; I doubled it, and then found I needed even more.

January 8, 2009

Tahini-Lemon Sauce

The abundance of Lebanese restaurants in Portland naturally fuels a lively debate over which one is the best. There are many theories, from Ya Hala to Al-Amir, but it is the first Lebanese restaurant I was introduced to that remains my favorite. Nicholas, the hole in the wall off Grand, vastly out-ranks the others--for only one reason: the tahini. It's ridiculously divine and I am simply incapable of describing it well enough to do it justice.

Every time I go, I order the vegan mezze platter--which last for at least two meals. It includes falafel and hummus, all you can eat pita, a garbanzo dish, tabouleh and more. It's all delicious, but I'm really just looking for that huge puddle of tahini. One dip with a chunk of fresh, hot pita and I'm completely, utterly satisfied. The long wait for a table? Worth it for that one bite.

Here is a recipe I decided to try, since I can't afford to eat out much any more. It's from my trusty original Moosewood Cookbook--copyright 1977. This turned out very well--and far outshined the falafels (from a mix--next time from scratch!) we also attempted. I'm fairly certain it's as close as I'm going to get without the secret recipe from Nicholas' kitchen.

  • 1 1/2 cups tahini (sesame seed paste--found near the peanut butter in the supermarket)
  • 1 1/2 cups plain yogurt
  • 1 medium clove crushed garlic (I love my jar from Trader Joe's!)
  • 1/2 cup fresh-squeezed lemon juice (around 3 lemons)
  • 1/4 cup chopped (or finely-minced if mixing by hand) scallions (I used regular onions.)
  • 1/4 cup chopped (or finely-minced if mixing by hand) parsley
  • Salt to taste
  • 1 or 2 dashes cayenne
  • 1 or 2 dashes paprika
  • 1/2 teaspoon cumin (or more, to taste--I'm a huge fan of this spice...)
  • 1 or 2 dashes of tamari
  1. Combine ingredients in a food processor and pulse until creamy and smooth. (You can also use a wisk or an electric mixer.) Sample the mixture and add ingredients to suit your taste.

November 18, 2008

Easy Peanut Brittle

My mom and I always made this recipe during holiday baking sessions when I was a child. It's a recipe that her dad made often with her. I hadn't made this peanut brittle in years, but a friend of mine suggested a potluck of food our grandparents would have made and this was an obvious choice. I was a little worried it wouldn't turn out right, but it's as easy as I remember. You just have to move quickly! This is prepared mostly in the microwave, so it's nice to have a microwaveable pot (glass or porcelain) with a handle. Lacking anything close, I just used a glass mixing bowl, which meant I needed help pouring the molten hot brittle out to cool. It got a little messy, but the brittle turned out delicious. (My friends seemed to think so, too.)

Carl's Microwave Peanut Brittle:

  • 1 cup sugar
  • 1/2 cup light corn syrup
  • 1 cup salted, dry-roasted peanuts
  • 1 teaspoon butter
  • 1 teaspoon vanilla extract
  • 1 teaspoon baking soda
  1. Use a deep (microwaveable) mixing bowl with a handle. Mix the sugar and the light corn syrup. Microwave on high for 4 minutes.
  2. Add peanuts and mix well. Microwave on high for 4 minutes.
  3. Add butter and vanilla. Mix well. Microwave for 1 minute.
  4. Add baking soda. Mix together quickly and pour onto a buttered cookie sheet or marble slab.
  5. Break up when completely cool. (Do not put in the refrigerator.)
Different microwaves may require different times. (But these times worked fine on mine!)